
ZIPCAM GUIDE · FREE PHOTOS · PRO VIDEOS AND FOLDERS
How to use ZipCam for photo and video compression on Mac
ZipCam runs on Apple silicon Mac as a Designed for iPad app. Import a photo with Command-O or drag it into Compress; use Batch for a set of files. Photo compression is free, while videos, folders, Cleanup selection, and the in-app library require Pro.


Free photos · Pro videos and folders · See current Pro purchase terms in the app
Free photo compression on Mac includes a required video ad. See banner ads and the 24-hour video-ad-free period.
Choose a workspace for the files you have
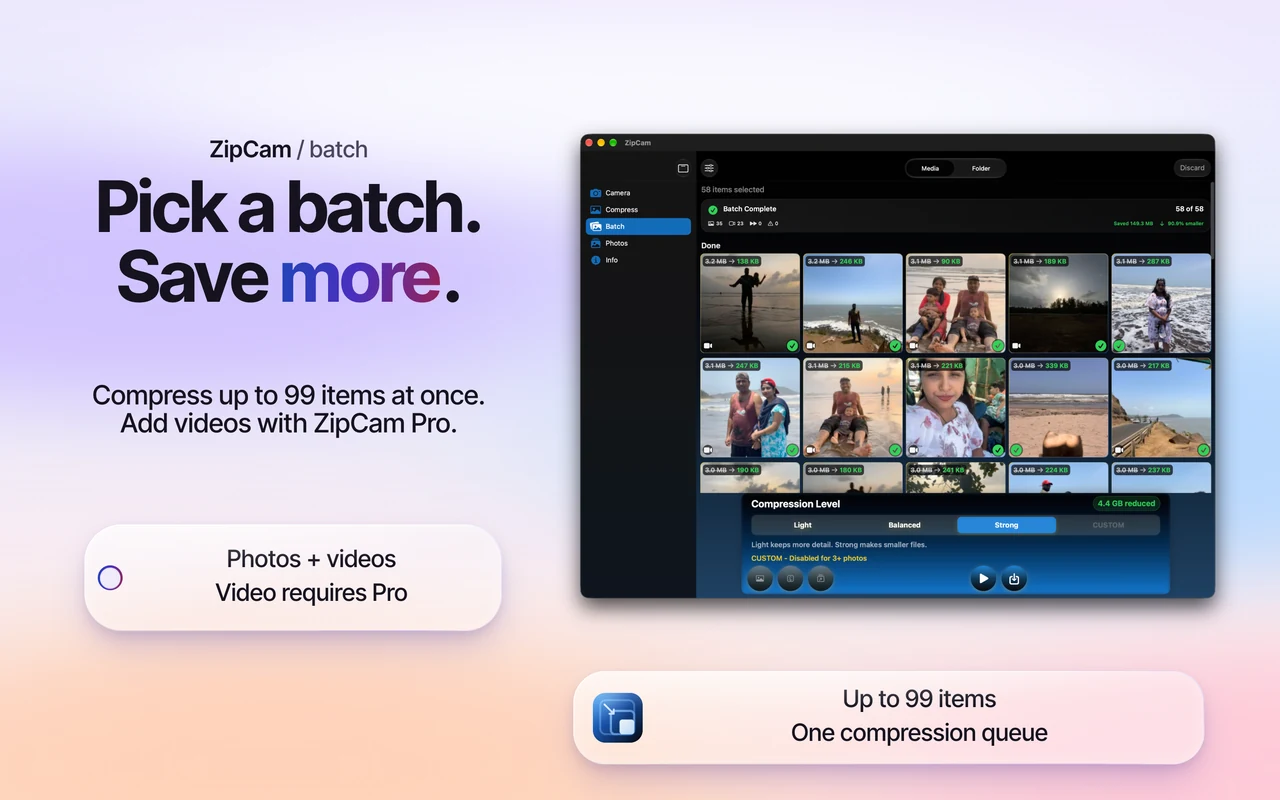
Compress is the starting point for one photo. Batch collects multiple media files and shows a thumbnail grid, with a preview beside the queue when you open an item. Folder mode is useful when your media is already arranged in directories and subdirectories.
The first Mac launch opens Compress after setup; later launches can return to your last selected tab. Use the sidebar to move between Camera, Compress, Batch, Photos, and Info. The Photos section is ZipCam’s optional in-app library, separate from Apple Photos.
Import with Finder or the keyboard
- Use Command-O to open a supported file, or drag one photo from Finder into Compress.
- For multiple photos, open Batch and drop the selection into its queue.
- Choose a quality preset and start compression.
- Open a thumbnail to inspect its preview beside the queue and check the output size.
- Save the result and use available Finder actions to locate file outputs.
Command-1 through Command-5 switch between the main sections. Shift-Command-O opens a folder with Pro. Video and folder drops also require Pro, while photo drops and regular photo batches are free.
If Finder drag and drop does not work
In ZipCam’s Mac settings, set Touch Alternatives to Off before retrying Finder drops. The empty Compress and Batch workspaces include this Mac-specific hint. You can still use the file picker while checking the setting.
Compress uses the first supported photo when several are dropped onto that single-image workspace. Drop the collection into Batch when every image needs processing. Unsupported input needs a supported image or video workflow; dragging a document does not convert it into a photo.
Use previews and progress on the desktop
Batch keeps the thumbnail queue and adjacent preview together, making it easier to inspect results without leaving the workspace. Closing the preview restores the grid’s full width. Available context actions include Preview, Reveal in Finder, and Discard when the queue permits removal.
Follow progress in the Mac window. Supported iPhone Live Activities are a different surface and are not the Mac progress interface. For long directory runs, inspect the completion summary and output folder instead of treating a notification as proof that every source succeeded.
Take a photo with a nearby iPhone
Camera can select a nearby iPhone as its live camera source through Continuity Camera. Apple requires compatible devices, the same Apple Account with two-factor authentication, and appropriate connectivity. Check Apple’s current Continuity Camera requirements if the source is unavailable.
The iPhone supplies the camera; ZipCam is running on the Mac. File import remains an alternative. Share Sheet compression described in the mobile sharing guide is for iPhone and iPad. For a large Finder collection, read the Folder/Infinity guide before starting.
Mac workflow and drag and drop: common questions
Why does dropping several photos into Compress open only one?
Compress is a single-photo workspace and uses the first supported photo from the drop. Drop the selection into Batch to add multiple supported items to a queue.
Is ZipCam for Mac available for Intel Macs?
This guide covers the Designed for iPad app on Apple silicon Mac. It does not describe an Intel Mac version or a separate native Mac app.